How to Organize Under the Kitchen Sink: Practical Ideas That Work
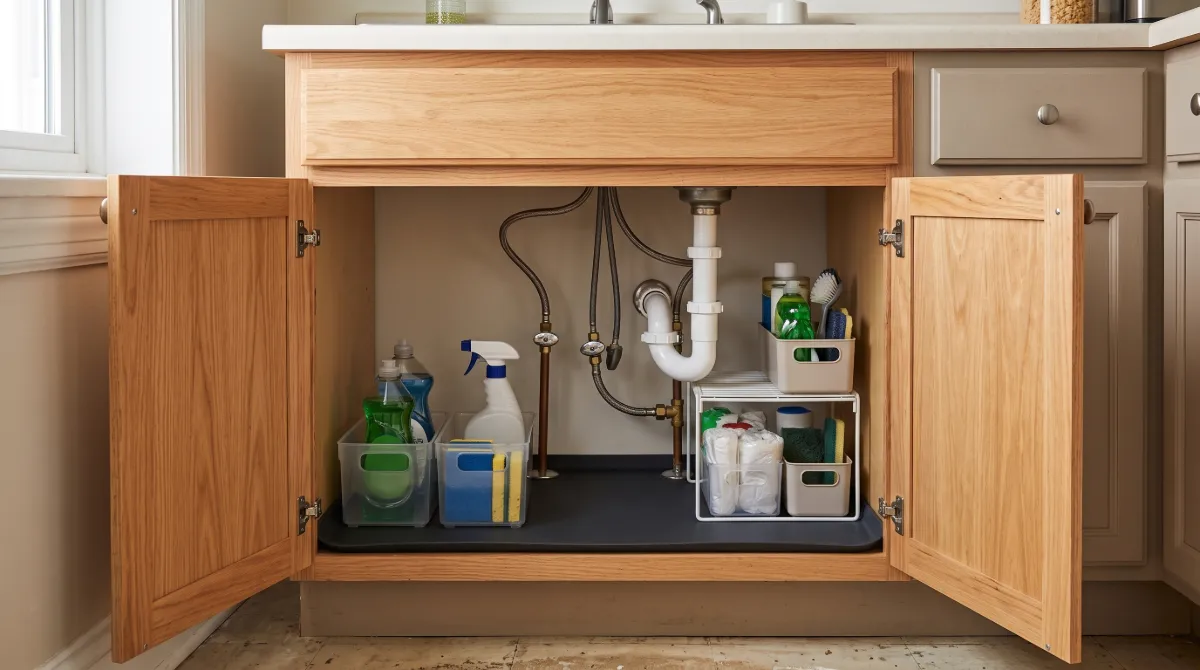
Under kitchen sink organization ideas work best when they account for plumbing pipes, shut-off valves, and limited cabinet space. Before buying storage products, measure the usable area and check for leaks or moisture.
This cabinet can be difficult to organize because pipes take up valuable room, cleaning supplies come in different shapes and sizes, and items pushed to the back are easy to forget. The key is to decide what belongs under the sink, group similar supplies together, and choose storage that fits around the plumbing.
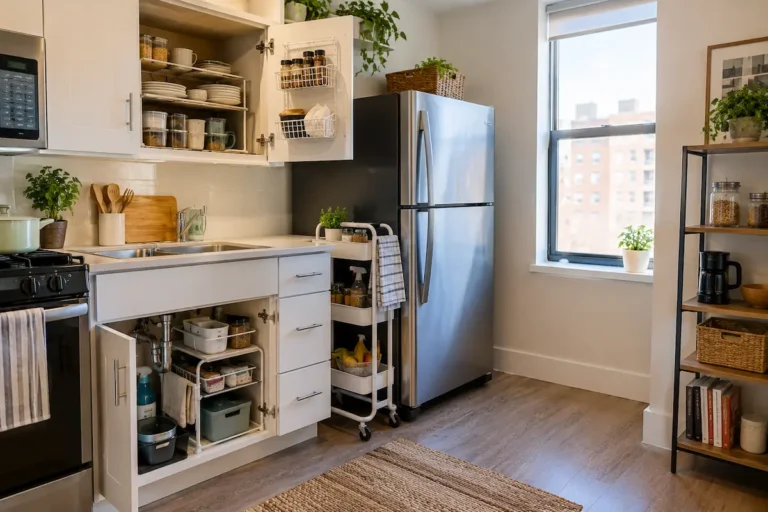
With a practical setup, you can make better use of the available space and keep everyday essentials easy to reach—even in a small apartment kitchen.
1. Empty the Cabinet Before Organizing
Before moving things around, take everything out of the cabinet. Organizing around existing clutter often leaves you with the same problems in a slightly different arrangement.
Place the contents on a clear surface and group similar items together.
For example, you might find:
- Dish soap and dishwasher detergent
- Sponges, scrub brushes, and cleaning cloths
- Surface cleaners and other household cleaning products
- Trash bags and spare liners
- Reusable cleaning gloves
- Extra supplies that are rarely used
Check each item before returning it to the cabinet. Discard empty packaging and dispose of unwanted products according to their labels and local disposal guidance. Keep products you still need, but avoid storing several backups simply because there is room.
Next, look for signs of moisture, damaged packaging, rust, or a musty smell. These can indicate a problem that needs attention before you organize the space.
The goal: Keep only suitable, useful items under the sink. Fewer items make the remaining storage easier to arrange.
2. Measure Around Pipes, Valves, and Hinges
One of the biggest mistakes when organizing a sink cabinet is measuring the cabinet as if it were an empty box.
The usable space is often much smaller than the cabinet’s full dimensions because the drainpipe, water lines, shut-off valves, cabinet hinges, and doors can interfere with storage.
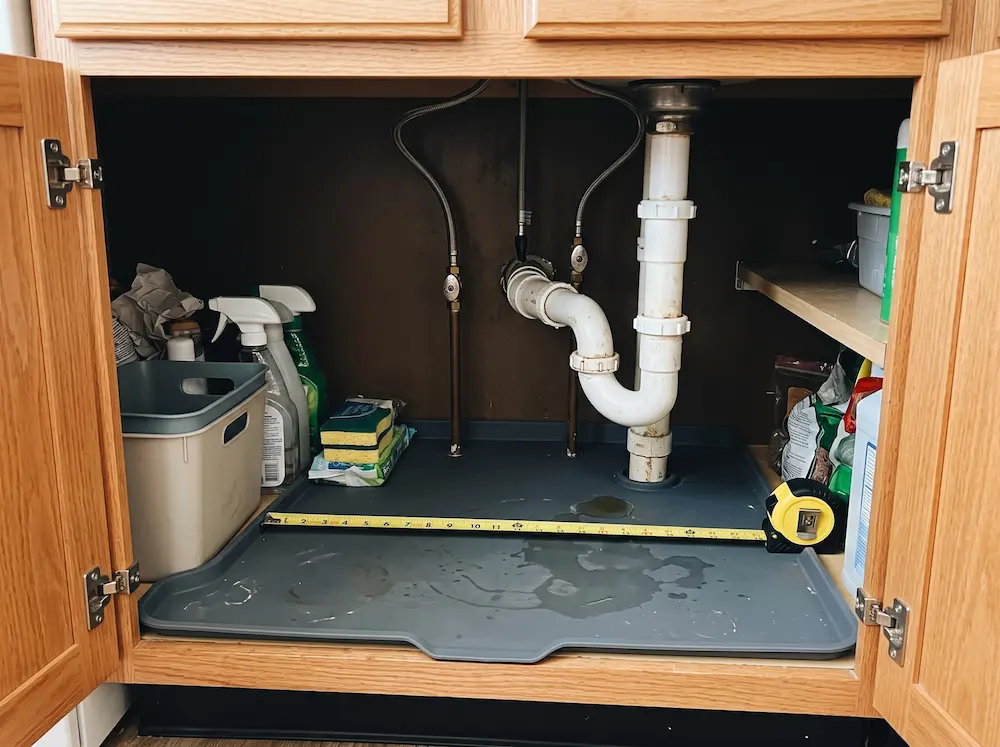
Before buying or placing an organizer, measure the actual available space.
What to measure
- Width: Measure the clear space between the cabinet sides, accounting for pipes and other obstructions.
- Depth: Measure from the inside front edge toward the back, noting where plumbing limits the usable area.
- Height: Check the vertical clearance below the sink bowl and around any low-hanging pipes.
- Door clearance: Make sure the organizer will not hit the doors, hinges, or cabinet frame.
- Access to shut-off valves: Leave enough room to reach the valves without removing half the cabinet.
If you are considering a two-tier organizer, measure the height of each level around the plumbing rather than relying only on the product’s total height.
For a pull-out tray, check whether it can slide forward without catching on pipes or the cabinet frame. For a freestanding bin, confirm that you can lift it out when you need to clean the cabinet or access plumbing.
A useful rule: Measure the clear space the organizer will occupy, not just the outside dimensions of the cabinet.
3. Check for Leaks and Moisture First
A neat cabinet is not useful if a leak goes unnoticed behind the organizers.
Before putting everything back, inspect the cabinet floor, the visible pipe connections, and the area around the sink drain. Look for water stains, swelling, peeling material, corrosion, or persistent dampness.
If you notice signs of a leak, address the plumbing issue before adding storage. Avoid covering a damp area with a liner or placing containers over it, since that can make a problem harder to notice.
Once the cabinet is dry and any necessary repairs have been handled, choose storage that is appropriate for the space. Removable bins and trays can make future inspections easier because you can take them out without dismantling the entire setup.
Avoid assuming that every cabinet needs a waterproof liner. The right choice depends on the cabinet material, its condition, and the manufacturer’s recommendations.
4. Group Supplies by Purpose
The easiest cabinets to maintain have a clear purpose for each area. Instead of placing items wherever they fit, group products according to how you use them.
For example:
- Dishwashing supplies: Dish soap, dishwasher detergent, and other appropriate dishwashing products.
- Cleaning tools: Sponges, scrub brushes, and washable cleaning cloths.
- Trash supplies: Trash bags, replacement liners, and compatible accessories.
- Backup supplies: Unopened refills or other suitable extras that you use less frequently.
Not every kitchen needs all four groups. If your cabinet is small, keep the categories that make sense for your routine and store other items elsewhere.
Keep products that should not be stored together separate, and always follow the storage instructions on their labels. Household cleaners should not be transferred into food or drink containers, and incompatible products should never be mixed.
A simple system is usually more useful than a complicated one. If you can identify where an item belongs without thinking about it, you are more likely to keep the cabinet organized.
5. Choose Storage That Fits Your Cabinet
You do not need every type of organizer available. Choose one or two solutions that address the specific problems you found while emptying and measuring the cabinet.
Small removable bins
Small bins work well for grouping sponges, brushes, cloths, and other compact supplies.
Look for bins that fit the available width and can be lifted out easily. Handles may help when you need to clean the cabinet or reach an item at the back.
Avoid filling a bin so tightly that you have to remove everything to find one product.
Two-tier under-sink organizers
A two-tier organizer can make use of vertical space, especially when the cabinet has enough clearance around the pipes.
However, the second tier may not fit beneath a low sink bowl, and the center support can conflict with plumbing. Check the product dimensions and layout carefully before choosing one.
A two-tier design is useful only when both levels remain accessible. If the upper level blocks the lower one, it may create more frustration than it solves.
Pull-out trays or drawers
A pull-out tray can help you reach supplies stored farther inside a deep cabinet.
Before choosing one, check the full dimensions, the slide direction, and whether the mechanism leaves enough room around the plumbing. Also consider whether the tray can be removed for cleaning.
For a rental kitchen, a freestanding pull-out option may be preferable if it fits securely without requiring permanent installation.
Turntables
A turntable can make certain bottles or small containers easier to reach, particularly in a clear corner of the cabinet.
It is not ideal for every space. Pipes may leave too little room for rotation, and tall bottles can become unstable if the surface is crowded.
Choose a turntable only if it can rotate freely and its contents remain secure.
Adjustable dividers
Dividers can help separate flat items, small tools, or suitable supplies without taking up the space required by a larger organizer.
Check whether the dividers fit the cabinet and whether they can be removed when you need access to plumbing. Avoid arrangements that press against pipes or shut-off valves.
How to decide which organizer you need
| Your main problem | Storage option to consider |
|---|---|
| Small items get mixed together | Small removable bins |
| There is usable vertical space | A two-tier organizer |
| Supplies disappear toward the back | A compatible pull-out tray |
| Bottles are difficult to reach in a clear corner | A turntable |
| Flat items or tools need separation | Adjustable dividers |
These are starting points, not rules. Your measurements and plumbing layout should determine the final choice.
6. Under Kitchen Sink Organization Ideas for Everyday Access
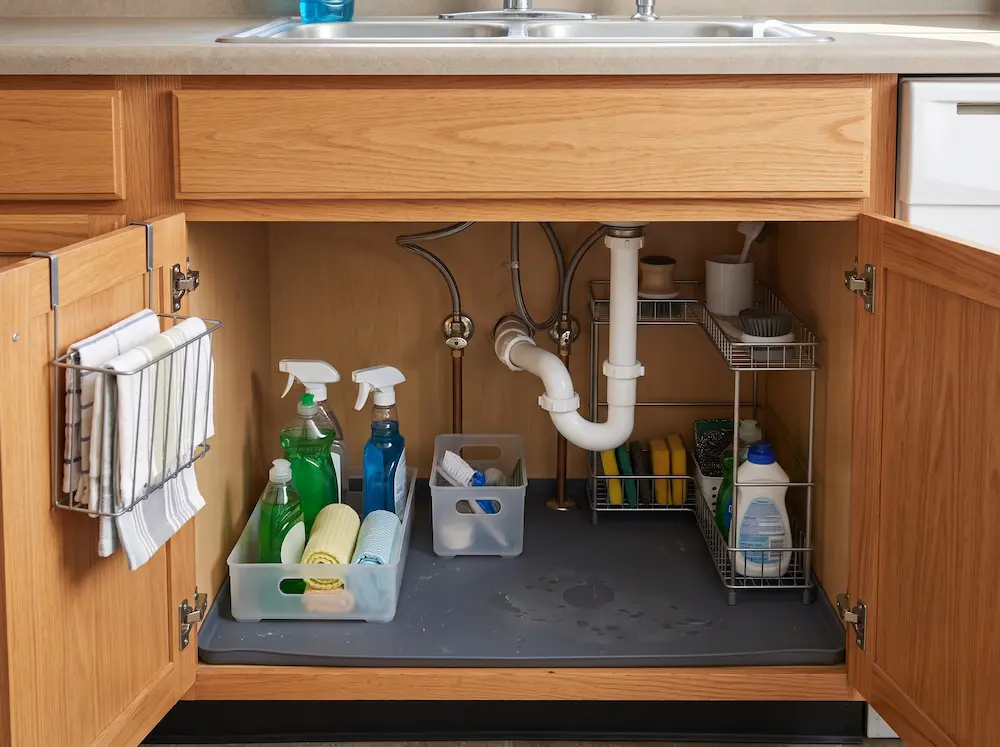
Once you have chosen suitable storage, return items according to how often you use them and how safely they can be stored.
Keep frequently used supplies in an accessible area, provided that doing so does not block the plumbing or compromise safety.
| Cabinet area | What to store there |
|---|---|
| Front, easy-to-reach area | Frequently used, suitable dishwashing supplies |
| Removable bin | Sponges, brushes, and cloths |
| Clear side area | Compatible cleaning products stored according to their labels |
| Back or less accessible area | Suitable backup supplies that remain easy to reach |
Use this layout as a starting point and adapt it to your cabinet. A pipe may divide the space into separate sections, or the sink bowl may leave more usable room on one side than the other.
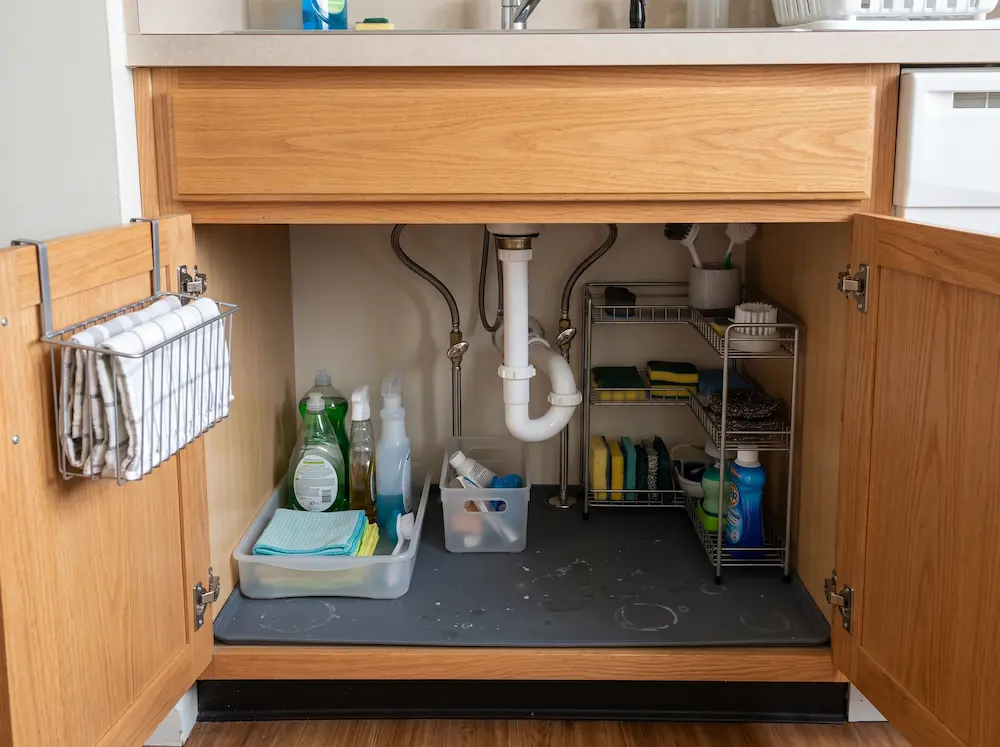
Keep the floor of the cabinet as visible as practical. This makes it easier to notice spills, dampness, or other changes that need attention.
Do not force a symmetrical arrangement if the plumbing is uneven. A practical layout that follows the shape of the cabinet is better than one that looks perfectly balanced but is difficult to use.
7. Store Cleaning Products Safely
The space under the sink is convenient for household supplies, but it is not automatically the right place for every chemical or cleaning product.
Read the product label and follow its storage instructions. Keep products in their original, clearly labeled containers, close lids securely, and do not mix different cleaning products.
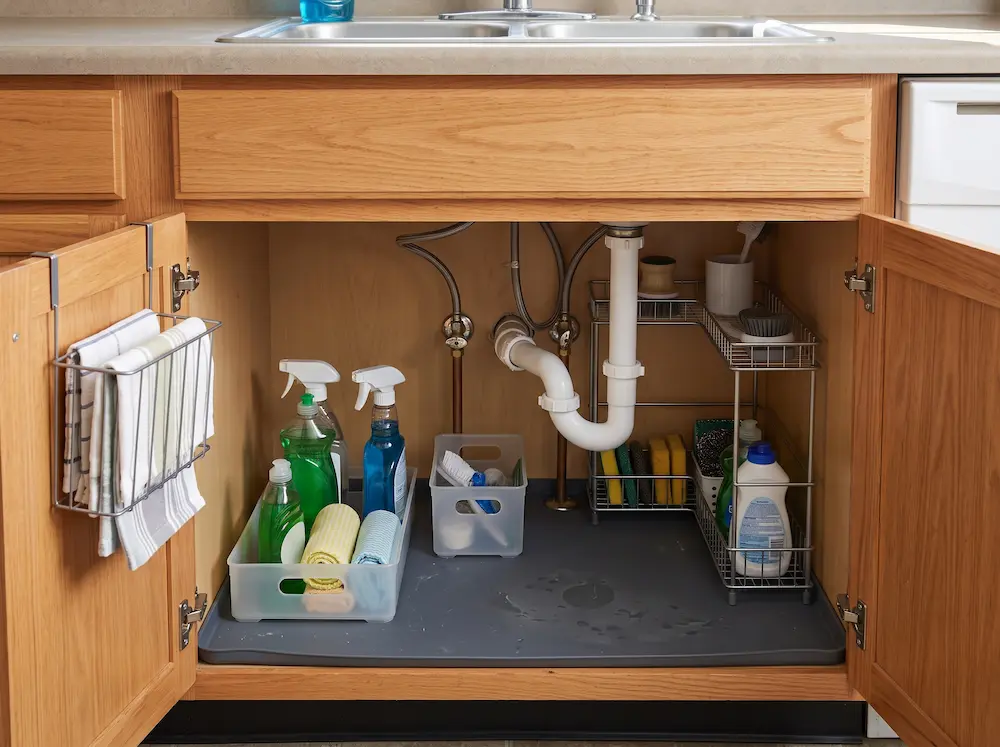
The U.S. Environmental Protection Agency provides additional guidance on household hazardous waste and safe product handling. Poison Control also explains why cleaning products should remain in their original containers.
Keep potentially hazardous products away from food, dishes, and items that come into contact with food. If children or pets can access the cabinet, use an appropriate child-resistant lock or choose a safer storage location out of their reach. A child-resistant latch is not a guarantee that a child cannot get into the cabinet.
Do not store a product under the sink if its label calls for a different storage environment. If the cabinet is prone to dampness or heat, consider whether another location is more appropriate.
Safety comes before convenience. An attractive organizer should never make a hazardous product easier for a child or pet to reach.
8. Make Under-Sink Storage Work in a Rental Kitchen
Renters often need storage solutions that do not require drilling, permanent hardware, or changes to the cabinet.
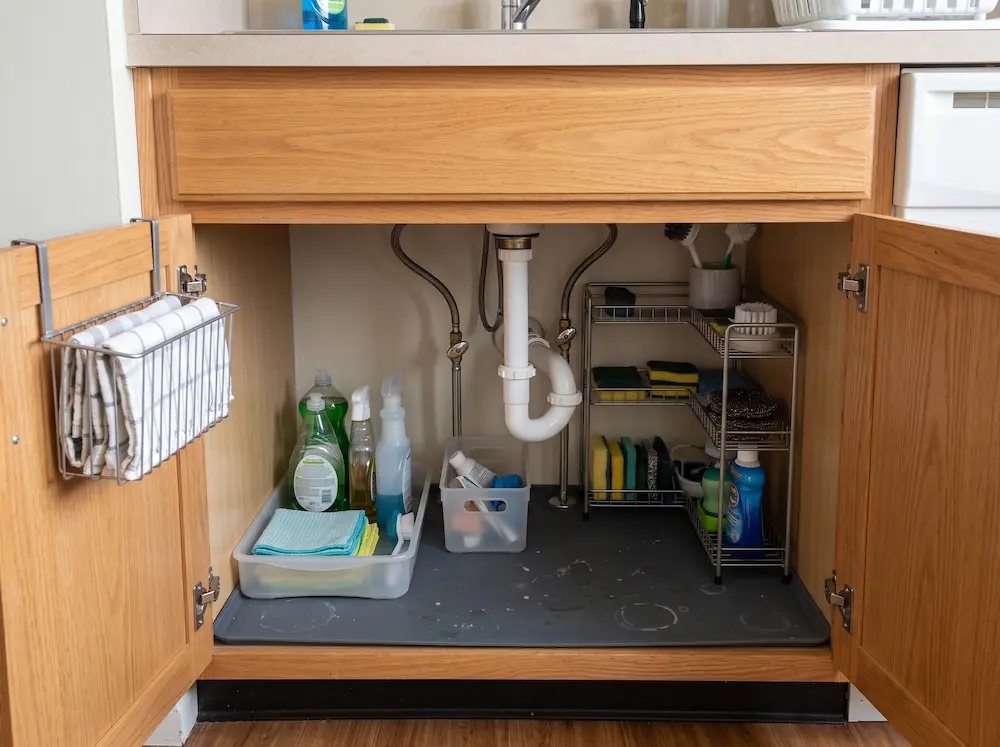
Start with freestanding options such as removable bins, compact trays, and organizers that fit the existing cabinet. Measure carefully so that you do not need to force an organizer into place or modify the plumbing.
A few rental-friendly tips:
- Choose removable storage that can be lifted out for cleaning.
- Avoid drilling into the cabinet unless you have permission.
- Do not attach organizers to pipes, valves, or plumbing fittings.
- Keep access to shut-off valves and connections clear.
- Check that liners or mats are suitable for the cabinet surface and will not trap moisture.
- Choose a setup that can be removed easily when you move.
For more ideas that work beyond the sink cabinet, see our guide to no-drill kitchen storage ideas for renters.
If the rest of your kitchen also lacks storage, our broader guide to practical kitchen storage ideas covers other ways to make better use of the space you already have.
9. Avoid These Common Under-Sink Organization Mistakes
Even a well-planned cabinet can become difficult to use if the storage choices do not match the space.
Buying organizers before measuring
An organizer may look suitable online but still collide with the drainpipe, cabinet door, or sink bowl. Measure the usable space first, then compare the product’s dimensions.
Filling every available gap
A tightly packed cabinet can make it difficult to reach supplies, remove bins, or inspect for leaks. Leave enough room for everyday access and basic maintenance.
Blocking plumbing access
Do not position bins or organizers where they prevent you from reaching shut-off valves or inspecting visible connections. Plumbing access matters more than maximizing storage.
Keeping too many backup products
Extra bottles and duplicate supplies quickly crowd a small cabinet. Keep reasonable quantities and place suitable backups where you can see and reach them.
Choosing an organizer that is hard to clean
A complex system can create extra work if crumbs, dust, or spills collect in inaccessible corners. Removable containers and trays may be easier to maintain.
Ignoring moisture
A liner or storage bin does not fix a leak. Check the cabinet periodically and investigate signs of persistent dampness before rearranging the contents.
10. Keep the Cabinet Organized With a Simple Routine
You do not need to reorganize the cabinet every week. A brief check when you restock supplies can help prevent clutter from returning.
Try this routine:
- Return each item to its assigned place after use.
- Remove empty bottles and packaging.
- Check that lids are closed and containers are not leaking.
- Wipe up spills promptly, following the product label where relevant.
- Check for dampness or signs of a plumbing leak.
- Reassess the layout when your household needs change.
If the cabinet becomes crowded again, identify the cause before buying another organizer. You may need fewer backups, a different storage location for certain products, or a better-fitting bin.
For a broader system that covers cabinets throughout the kitchen, see our guide on how to organize kitchen cabinets.
You can also explore our guide to small kitchen organization ideas for ways to make other compact areas easier to use.
Frequently Asked Questions
What is the best way to organize under the kitchen sink?
Start by emptying the cabinet, checking for moisture, and measuring around the pipes and valves. Group suitable supplies by purpose, then choose removable bins or another organizer that fits the actual space. Keep plumbing access clear.
How do I organize under a kitchen sink with pipes in the way?
Measure the clear space on each side of the pipes instead of treating the cabinet as one open rectangle. Small bins may fit around obstructions, while a two-tier organizer or pull-out tray may work if its dimensions and movement do not interfere with the plumbing.
Are two-tier under-sink organizers worth it?
They can be useful when the cabinet has enough vertical clearance and the support structure fits around the pipes. They are less suitable when the sink bowl hangs low or the upper level blocks access to the lower one. Measure before buying.
What should I keep under the kitchen sink?
Depending on the cabinet conditions and product labels, you may keep suitable dishwashing supplies, cleaning tools, trash bags, and selected household cleaning products there. Do not store products in ways that conflict with their labels, and keep hazardous supplies inaccessible to children and pets.
Should I put a liner under the kitchen sink?
A suitable liner may help protect some cabinet surfaces from minor spills, but it cannot prevent or repair a plumbing leak. Make sure the cabinet is dry, choose a liner appropriate for the surface, and check underneath it periodically so moisture does not go unnoticed.
How can I organize under the sink in a small apartment kitchen?
Keep only the supplies you need, measure the usable space carefully, and choose compact removable storage. Use vertical space only when the plumbing and sink bowl allow it, and avoid filling the cabinet so tightly that you cannot reach items or inspect connections.
Final Thoughts
Organizing under the kitchen sink starts with the cabinet you actually have—not the organizer you hope will fit.
Clear out unnecessary items, measure around the plumbing, check for moisture, and group suitable supplies by purpose. Then choose storage that makes everyday items easy to reach without blocking valves or creating safety problems.
A simple, well-fitted setup is often more useful than a cabinet full of organizers. Keep the system easy to maintain, and you will have a better chance of keeping this awkward kitchen space functional over time.